Impress supports lazy-loading images. This means that once you open a presentation with lots of
slides (our testcase was 85 slides), then only the first few slides are rendered, and the images on
other slides aren't even parsed / decompressed.
This is good, the first slide is rendered faster this way. Also the preview of the first few slides
are shown, but the rest of the slides are not rendered, so you can even edit the first slides
without "swapping in" images on later slides.
But we noticed that copying slides between documents means saving the copied slides to ODP, and we
swap in images during ODP save, which makes this operation slower than it needs to be. In practice
75% of the cost was uncompressing PNG files to calculate a checksum on the raw pixel data:
The the issue shows that our goal is to
not call ImpGraphic::ensureAvailable() while saving to ODP. The first step was to calculate the
checksum on the compressed image data. After that, we get a new flamegraph:
Here we swapped in to always have access to a "graphic link". This gives access to the underlying
compressed image data. But a just created image may not have that compressed form, so if you
unconditionally want a "graphic link", you hit a complex code path, which includes swapping the
image in. The solution is to ask for the "shared graphic link", which may not be available. It is
typically available and is the fast path; and we have fallback code in place if the graphic has no
"graphic link". After fixing that, we get a third bad flamegraph:
This last problem is around producing something called a GraphicID. This is used to identify an
image in a unique way, and ODP save uses it to name the graphic in the ZIP file as something like Pictures/10000201000000130000001391B82C7409B72726.png. After fixing that to only use image metadata we get a much more reasonable performance profile:
Inter-dependent change tracking in Collabora Online was mostly a
topic last year, see the post from
November for more info about the
feature in general: this is the case when you create a change on top of another change.
This post is meant to deal with the situation where you already have a recorded formatting and
somebody else creates a new formatting on top of that.
Writer supports insert-then-delete, insert-then-format and delete-then-format as combinations of
changes with different types. So format-on-format is not supported at a file format level, DOCX
can't represent it, either.
But instead of just losing the old format when we create a new format, we can do better: update the
format redline to now track the formatting of the union of the old and new format change.
This still means that the metadata (e.g. author) will be only stored for the new change, but accept
or reject on the format will result in the expected formatting.
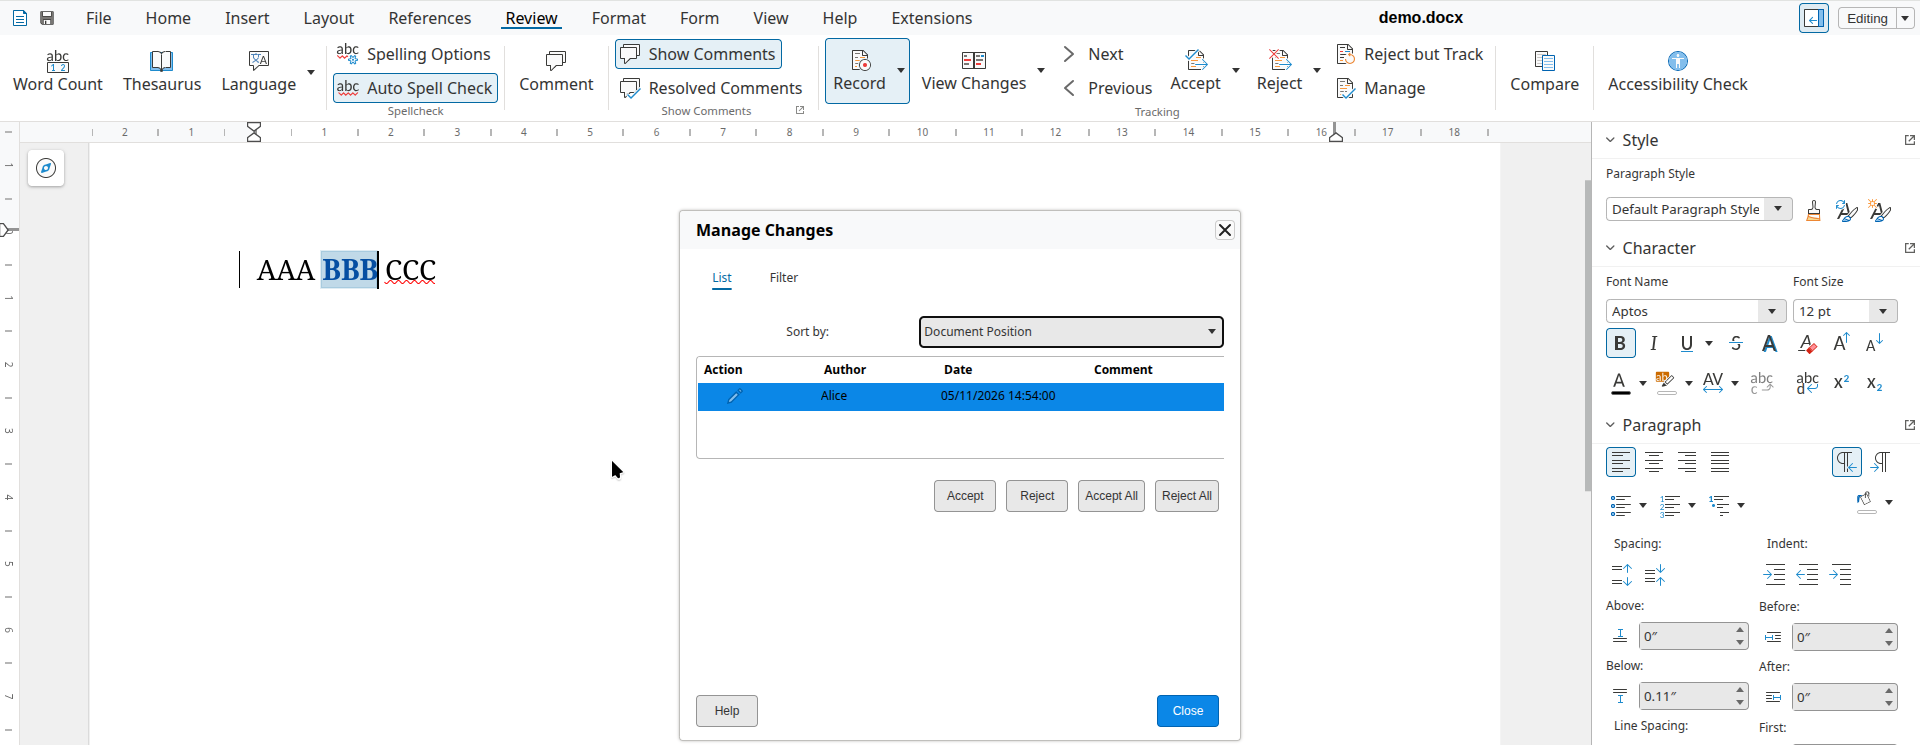
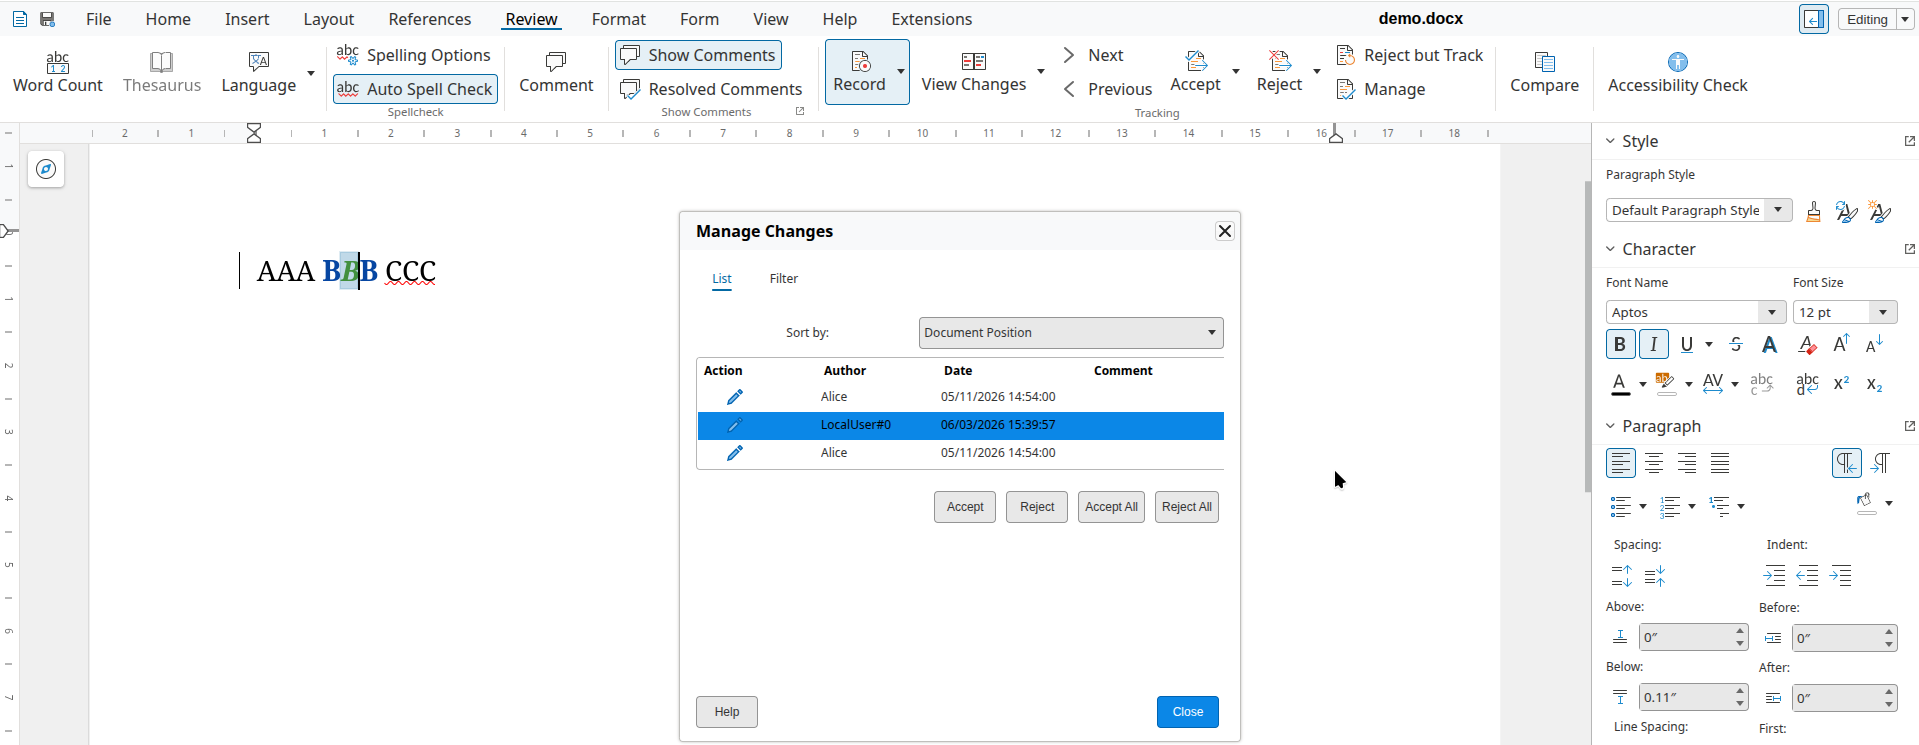
And now once a different editor marks the middle B as italic, additionally, then the formatting on
this middle character is now attributed to the new editor:
Without the fix, rejection only removed the italics. With the fix, now reject correctly removes both
the bold and the italic formatting. Accept is a little bit easier, since we don't need to touch the
formatting in the model, just delete the change from the table of changes.
Writer import filters operate in two modes: normally an empty model gets populated by reading user
input from a file, in a certain format. You can also paste similar data from the clipboard, in which
case the target model is not empty and this introduces some complexity.
The markdown import was missing some tweaks which were there already in the ODT and RTF paste code.
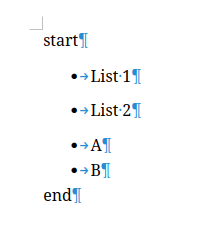
Additionally, given that markdown only allows limited formatting, it makes sense to inherit more
formatting from the paste position, so the pasted content's formatting is consistent with the
formatting of the surrounding content.
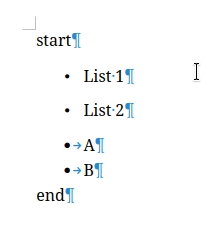
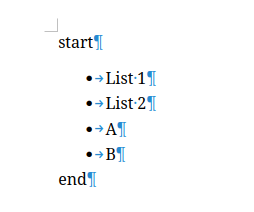
The document from the issue had bullets
with text "A" and "B", the first problem was that pasting before "A" resulted in a mix of existing
vs pasted content:
The document compare view in Collabora Online Writer allows
comparing documents side by side, see the first post for more
info about the feature in general.
This second post is meant to give you an update on what happened in this area in the last month.
Collabora Online core supports showing or hiding tracked changes in document content, we have a UI
button for that, see the notebookbar's Review tab, the Tracking section's Show button.
Entering doc compare mode or leaving it works by clicking on the View Changes button, in the same
section.
But this means that you can show/hide changes (modifies the document layout, affects everyone) and
also view them (only affects your view), and they do quite different things. :-)
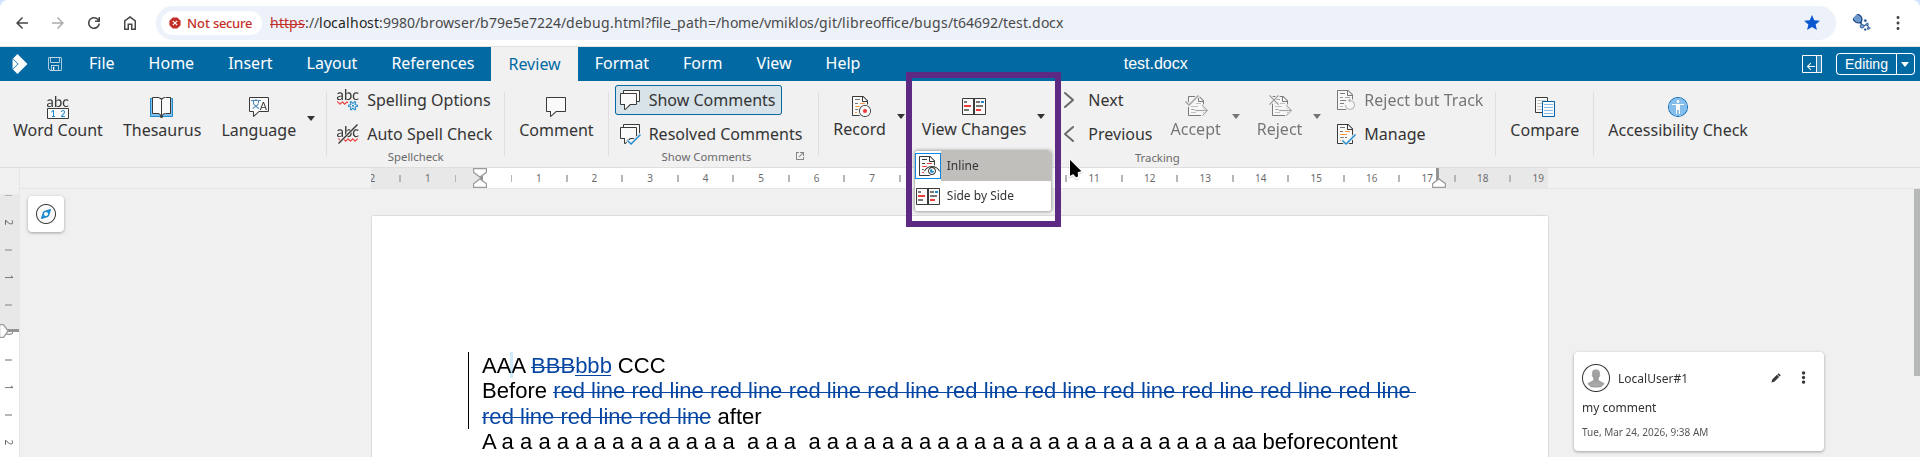
The new UI has a button with a drop-down: the button is toggle that reflects if you compare change
side-by-side or not. And if you click the drop-down next to the button, it's clear that show/hide
is for inline rendering in the document layout while the other option is to render changes
side-by-side:
There were also a number of other smaller improvements: now side-by-side rendering works nicely if
you use IME to type characters, a missing invalidation is sorted out and side-by-side rendering is
better with comments.
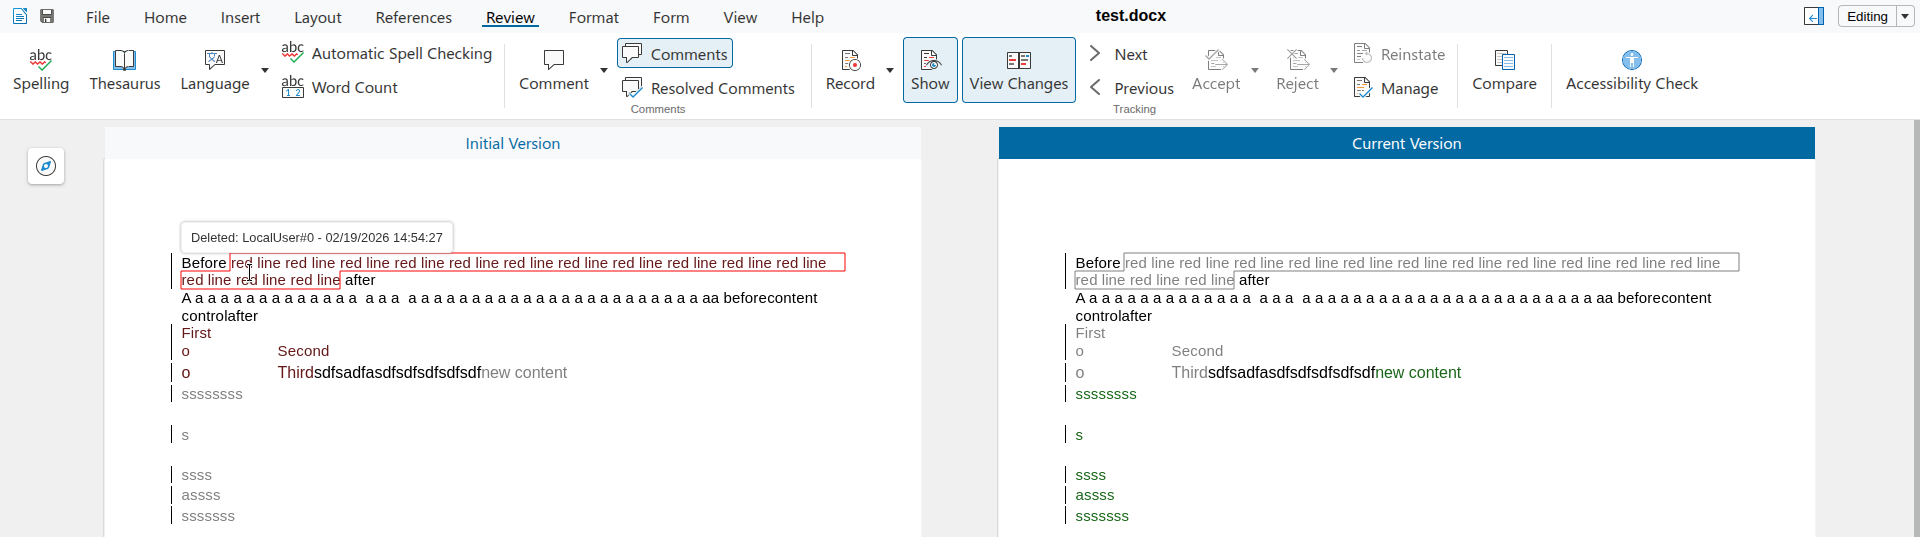
If you have two documents or two versions of a document to compare, then traditional tracked changes
is too late, the untracked changes are already in the document.
This work for Collabora Online adds interactive a
non-interactive document compare to create tracked changes after the fact, finally introduces a
document compare view, to better understand these changes.
Collabora Online's core already contained a document compare feature, but this was never integrated
with the SDK (REST API) or with the browser UI.
Additionally, while some users took a training in understanding track changes (or: redlines), the
usage of underlines for inserts and strike-throughs for deletions may not be obvious. An
alternative of this is a side-by-side view, which is now available in Collabora Online for text
documents.
See the SDK, now
you can convert e.g. an editable (new) docx file to PDF in a way that your request references your
old docx file as a parameter, and the resulting PDF shows the differences:
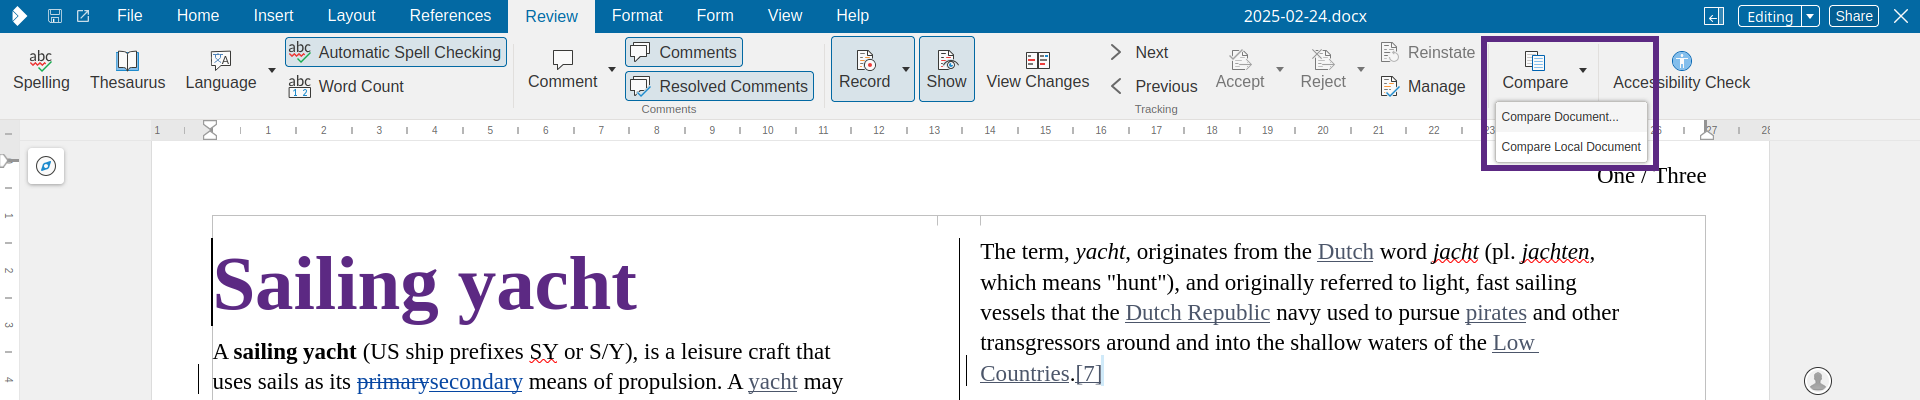
Technically this is a bit similar to image insertion: once you open your new document, you can
compare its content with an old local or remote document:
We worked with Gokay to build this. The LOK API now provides "tile modes" for text documents,
similar to how presentations already have tile modes for slide content, master pages and notes. The
default tile mode is unchanged for text documents, but the Review tab of the notebookbar has a View
Changes button and then the new left hand side, right hand side tile modes allow you to show the
changes side by side:
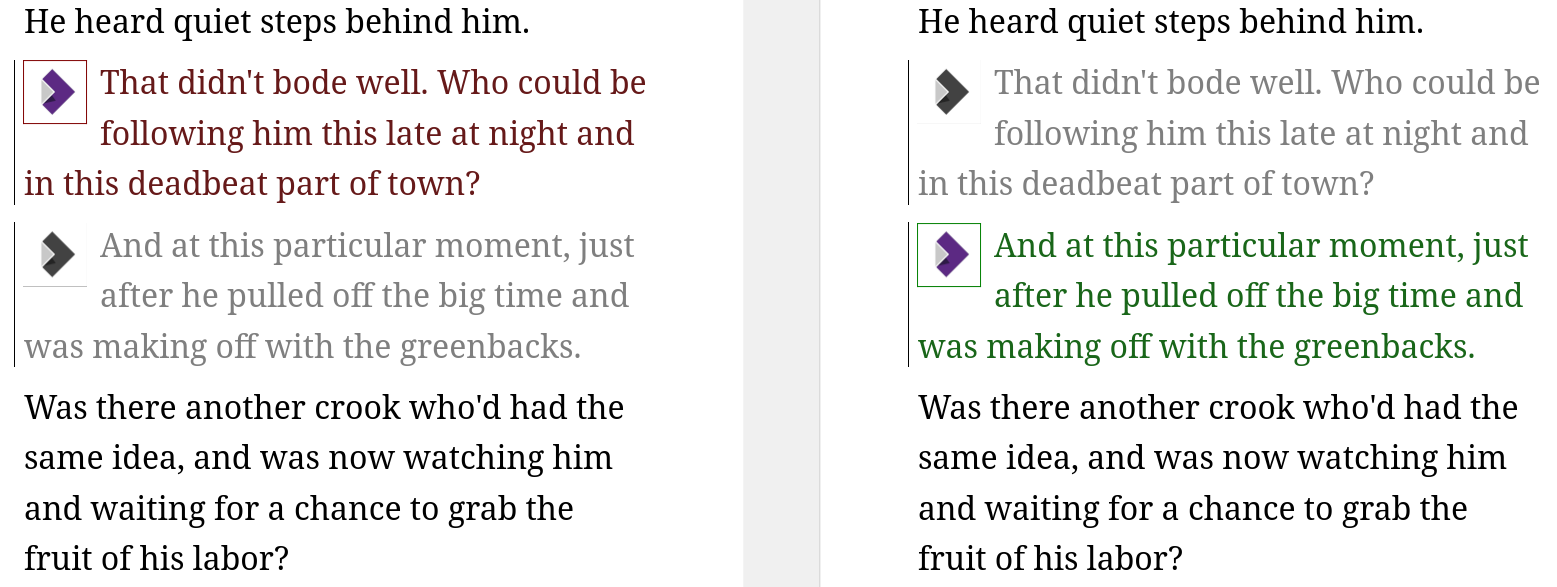
Removed content is colored with a red-like color, added content is colored with a green-like color.
The matching content on the other side is gray. This is not only for text, e.g. images have a frame
with a similar color.
Now that the LOK API could provide tiles either left or right hand side mode, Gokay built a whole
new tile layout on the browser side, so these are shown nicely side by side.
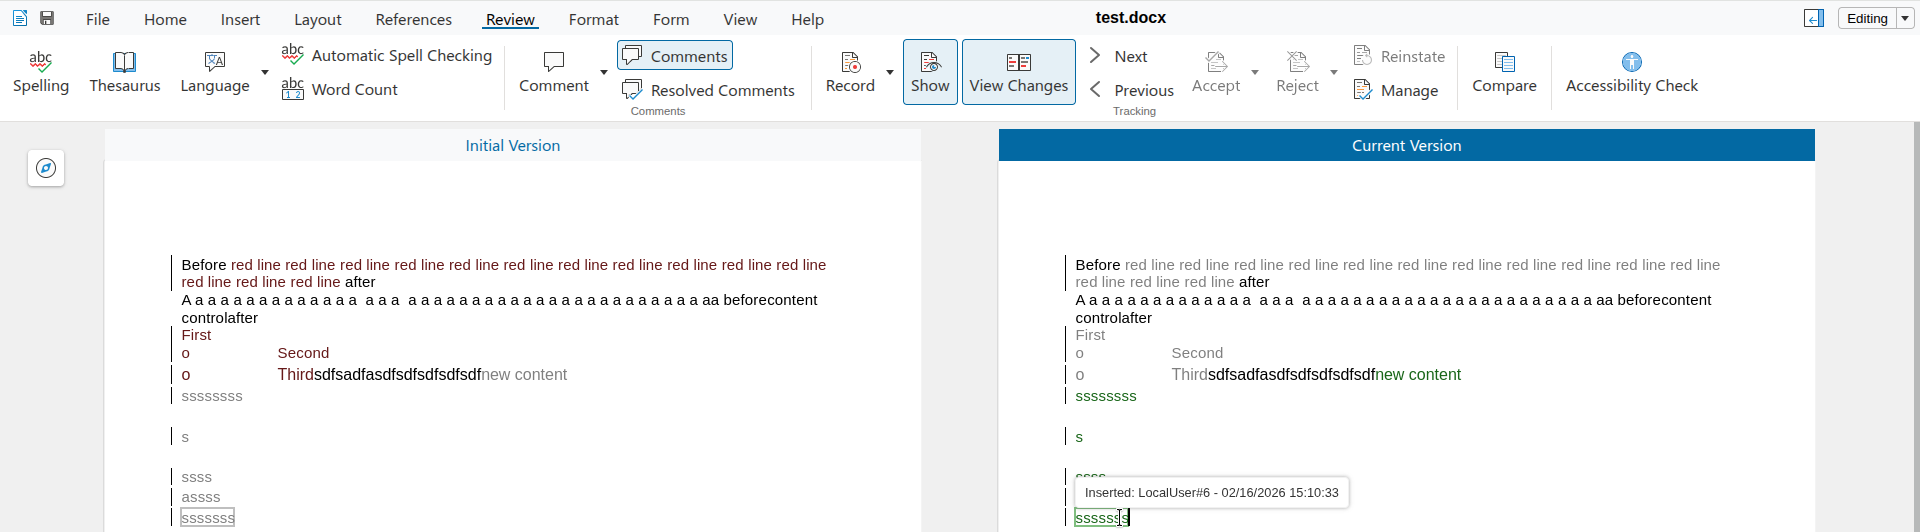
To better understand what you see on your screen, now there are also labels at the top of the first
pages:
This describes the purposes of the two sides, and in case you're right after a document compare
action, also shows you the file names, modification dates and author names.
For integrators, it's possible to start in this mode by default, if you append &comparechanges=1
to COOL's iframe URL.
Finally if you hover over a tracked change with your mouse, now you get a highlight for that piece
of text on both sides, to match the same parts of the old and new version better. A deletion looks
like this:
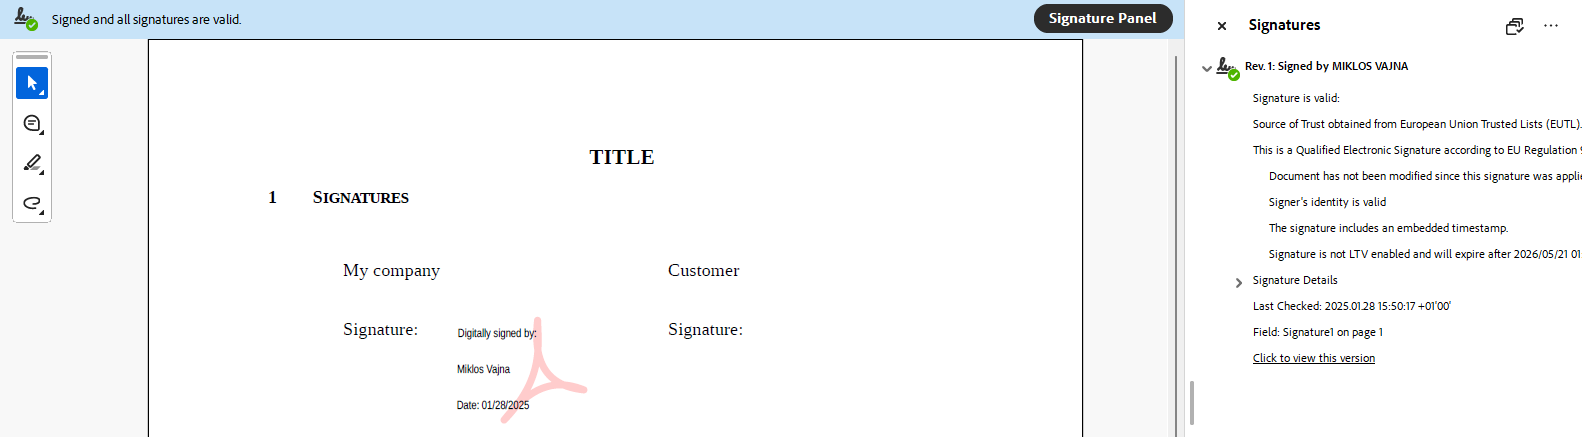
LibreOffice Technology had the concept of digital signing, but this was not available in Collabora
Online, so it was not possible to combine this with collaborative
editing. Also, once Collabora Online started to expose digital signing with software certificates
for ODF files, that also allowed taking a further step and start supporting electronic signing for PDF
files. Partnering with eID Easy, you can create strongest of the electronic
signatures – the mighty QES. This
means signing with Collabora Online allows you to:
create proper electronic signatures
not share your document with a 3rd-party, only the
hash of your
PDF will be sent to the external service
integrate with e.g. Nextcloud, use the feature without installing anything other than the
Nextcloud AIO image
potentially combine signing with other security features like Secure
View and
work with visual signing in a WYSIWYG way, which allows
placing a visible signature widget at the specified page, then dragging it to the preferred
position.
The sample integration presented here is for Nextcloud, but the feature can be made available in
other integrations as well.
See Collabora's blog
post
if you prefer less technical information about this feature.
Digital and electronic signing of documents is meant to be based on cryptographic security, and
traditionally this has been exposed to users in a very complex way. You need to know that first you
have to sign your macros and only then your document, you need to somehow get PEM files to have a
signing certificate, you need to somehow get your certificate trusted by some certificate authority
that is commonly trusted by other people who will verify your signature, and so on.
This lead to the need to first support digital signatures in COOL using a single signatures dialog
for ODF files and then later to provide electronic visual signing for PDF files, while continuing to
respect your privacy by not sharing your document with a 3rd-party service.
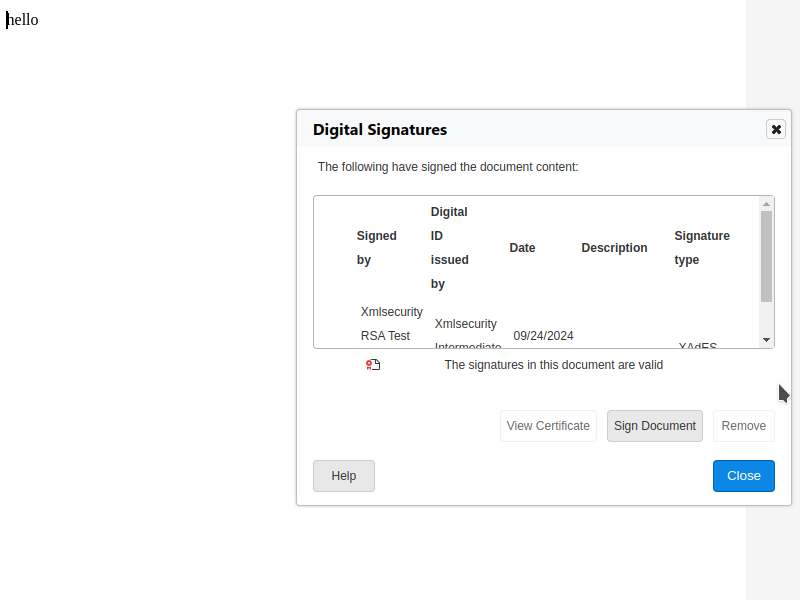
First the signature viewer dialog was turned into a read-write digital signatures dialog in COOL
that is still async (compatible with collaborative editing), first for ODF files & using PEM files.
Related to this, we automatically sign macros (if the document has macros) when signing the
document, so you can’t forget about this or get the order wrong (sign macros first, then the
document).
At this stage implementing signature removal was possible, which again needs an async conversion so
the user can confirm they really want to remove a signature. This also means the signature status of
the document can change, the COOL UI now supports this.
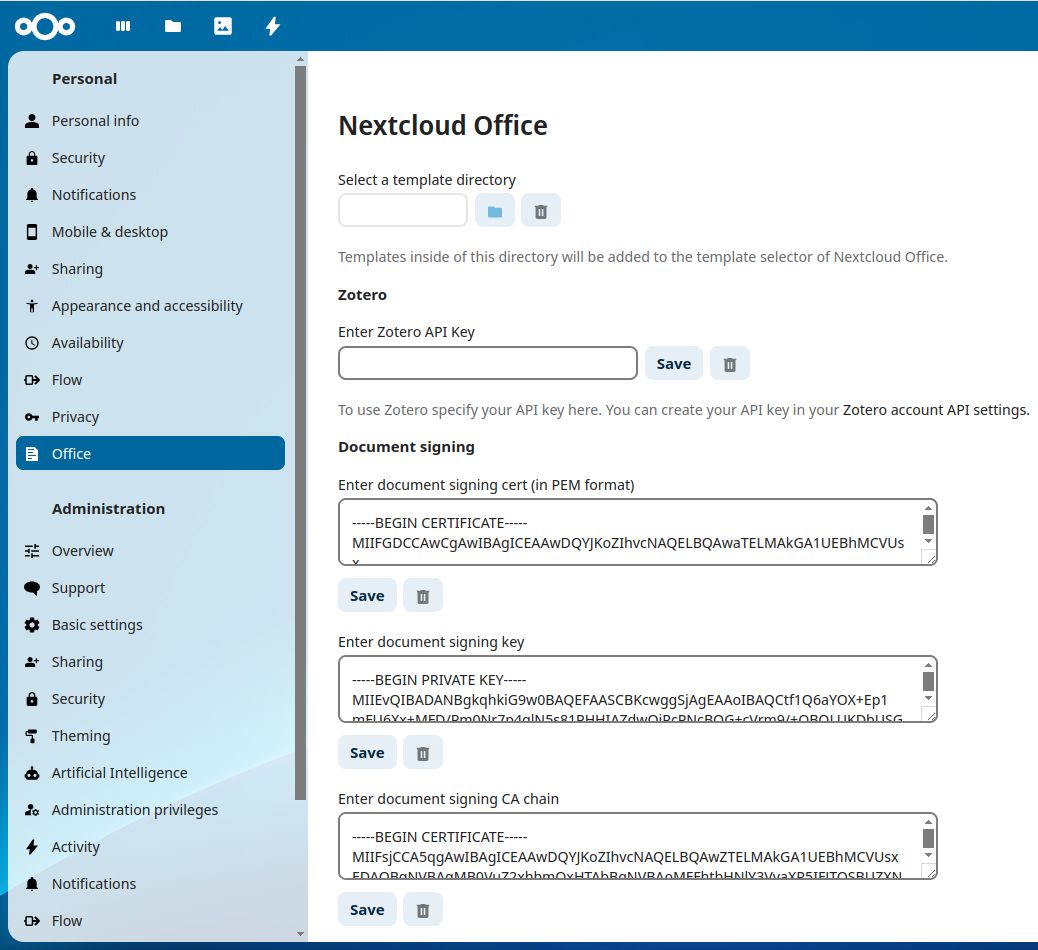
You can now associate a signing certificate / key / CA chain with a COOL editor, so you can sign the
document, but not an other editor working on the same document.
Finally adding a digital signature is now possible, where the certificate chooser just shows your
signing certificates and hides it from other editors.
Here is a screenshot of the early digital signatures dialog at this stage:
The second half of digital signing support in COOL started with WOPI extensions, so an integrator of
COOL can specify the signature settings on their user settings page and pass that to COOL when a
document is edited. We then send this to the document editor process only when needed, i.e. not on
file open, but when the actual signing process would start.
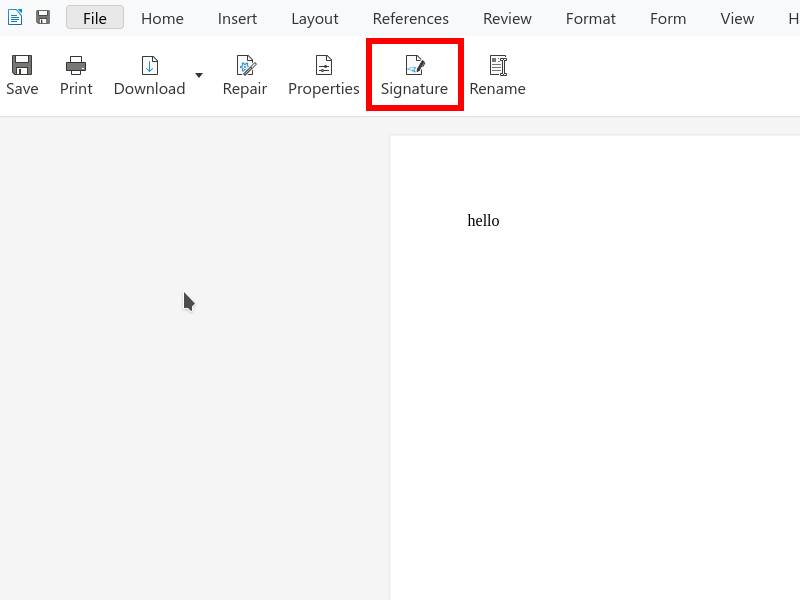
UI is also added on the notebookbar in the form of a new button that allows adding signatures to a
previously unsigned document – before you could only trigger the signatures dialog if the status bar
said something about existing signatures, and only then you could add a signature. This button is
hidden if you don’t have signature settings configured. It looks like this:
When was still missing here is automated Cypress tests to make sure signing e.g. an ODT file keeps
working and the SDK
documentation now
also describes what does it take to support digital signatures in your COOL integration. For example
you can create a Nextcloud integration like this:
Once digital signing of ODF files is handled, let’s switch to PDF signing, which is much more
interesting: you typically want to sign something final, and we see PDF as a final output of your
documents. So first support for digital signing of PDFs was added.
The next part is to integrate with eID Easy, which can do privacy-friendly electronic signing for
us. This is a 5 step process:
Extract the hash of the to-be-signed document. This is similar to signing, you start the process
but once you have the hash that you would sign locally, you just take that hash and abort the
actual signing.
Send this hash to the electronic signing service.
Open a popup and let the user authenticate with their credentials (passport, personal ID, etc)
using one of the providers (different providers support different countries) and sign the hash.
Download the signed hash from the service.
Serialize this signed hash into the local document. This requires producing the local PDF
signature once more, but this time using the previous timestamp (instead of the system clock, so
the hash is table) and using the downloaded PKCS#7 signature instead of locally signing something.
At the end we got something that looks like a signature produced externally, but there was no UI for
this. An initial popup for step 3 looked like this in the test environment (that doesn’t work with
real passport numbers or anything sensitive):
The next step was to create a user interface for electronic signing. The Insert menu had a new menu
item to insert electronic signatures and to specify your country, finally choose one of the
providers available in your country.
Also support for two types of providers is added: the first is the “in context” one, the other is a
“redirect based” one. We now support both: all the redirect (should be familiar to you if you ever
did e.g. online payments) happens in the popup, so the original COOL editor is never closed.
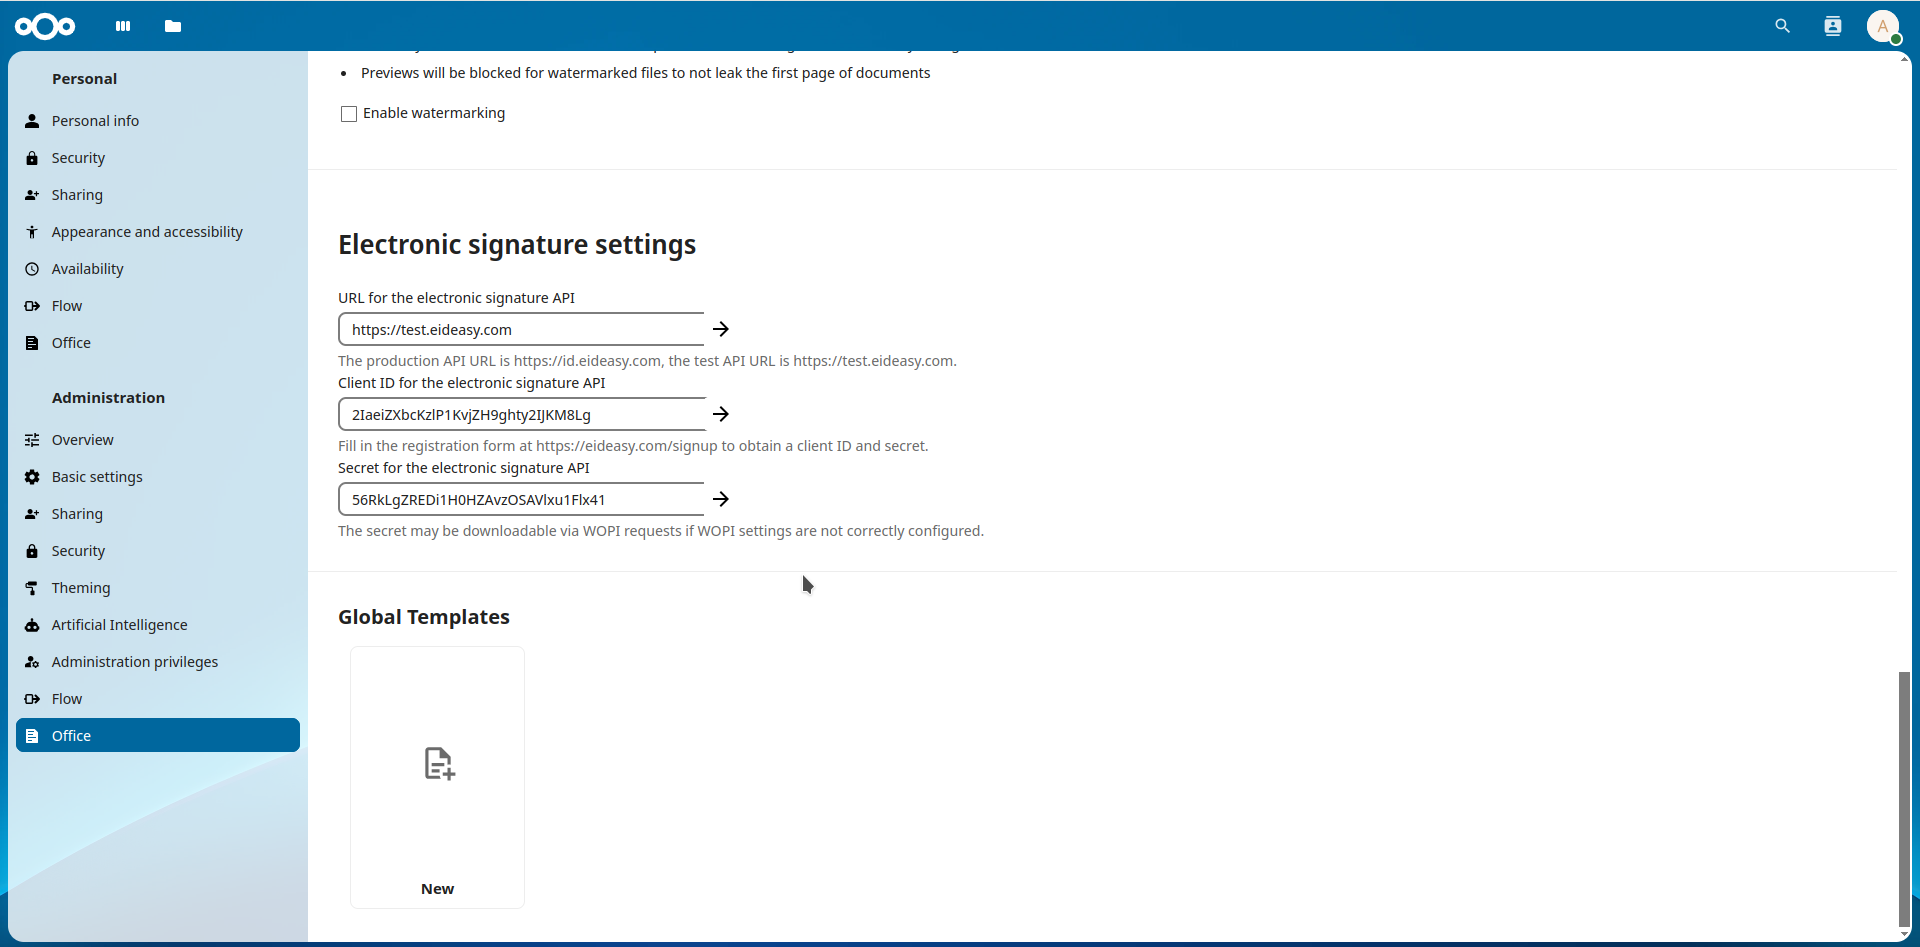
eID also has the concept of multiple tokens for signing: initiating the signing costs money, so is
done using a “secret”, which is never sent to the COOL JS code. Then the “client ID” identifies the
client, but can’t be used to start signing. Finally any single signing transaction has a specific
“document ID”. We took care to follow the guidelines here, so the sensitive “secret” for signing is
always kept on the server.
Similar to the initial document signing, electronic signing settings are also possible to specify
from an integration, we documented this in the
SDK
and also created a sample Nextcloud integration for this.
The last part of this electronic signing effort was to expose visual singing in COOL, something that
was added to LibreOffice Draw back in 2020, see this earlier blog
post.
First this was exposed in COOL with digital signing, in a way that the current page gets a signature
widget inserted at the page center and then the user can move that signature widget to the desired
location.
Combining this with electronic signing is a bit more tricky, since we don’t want to select a
certificate when the signature widget is inserted, we’ll deal with that in the external service, as
usual.
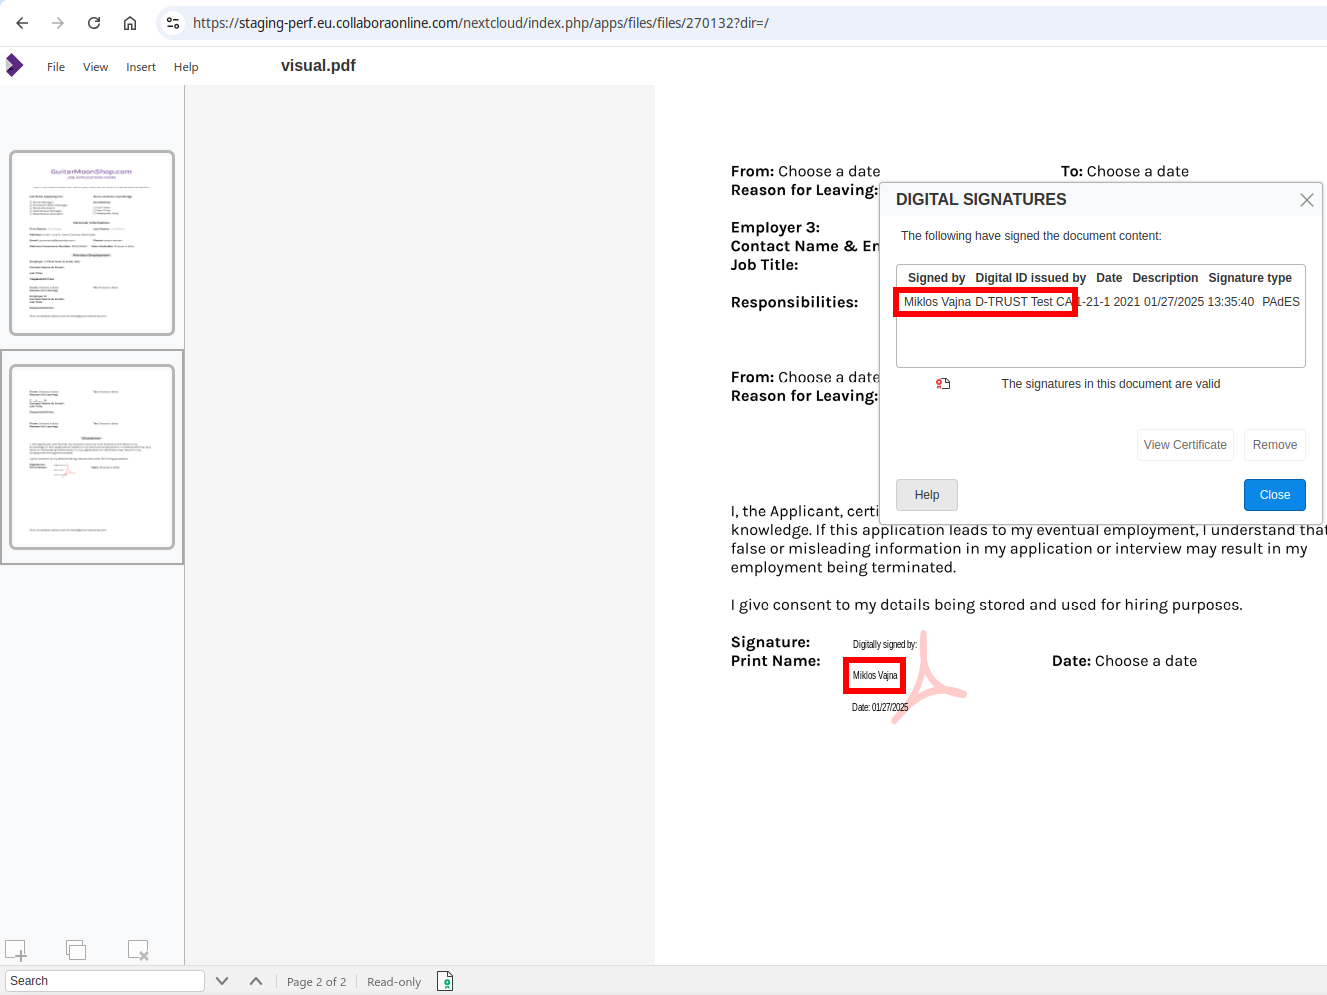
Also, there was no real reason to not use visual signing unconditionally, so now the way to initiate
a signing process is to open your PDF in COOL, use the Insert → Signature line menu item to insert a
signature widget, move it to the wanted position, click “finish” on the snackbar and that completes
the process with the usual electronic signing popup.
The final problem was that our multi-page PDF viewer was not really prepared to deal with changed
PDF content (assuming your PDF rendering will not change is reasonable), so some last minute work
had to be done to make sure the signature widget’s graphical selection indicator, its dragging and
its rendering works fine even on non-first pages of a PDF document.
At the end, a test signature using the d-trust signature provider’s test environment looks like
this:
If you would like to know a bit more about how this works, continue reading... :-)
As usual, the high-level problem was addressed by a series of small changes.
Collabora Online now takes the visible area (viewport) of large
Writer documents into account in more cases, leading to better performance & interactivity.
Collabora Online has two kinds of "visible areas" for a document: on one hand, the entire document
is visible, so in case any part of the document changes, the browser client gets notified; on the
other hand, there is a viewport in the web browser, and keeping that up to date is a priority,
compared to the rest of the document.
There were some cases in the past where we handled the entire document with the same priority,
leading to slower than ideal update times on the UI.
Wouldn't it be nice to always update the visible part first, and only then deal with the rest, on
idle?
When looking at this topic, we noticed a cluster of problems:
First, consider the case of a long (~300 pages) document, where you insert a page break at the start
and wait for the update of the visible area. The entire document layout (now 301 pages) were
calculated, and now we do this for the visible area synchronously (and the rest on idle). This
operation is now about 19 times faster.
Second, loading a long document calculated the entire layout before showing the first page. This is
now improved, the document loading time itself at a LOK API level for such a long document is now
about 5 times faster.
Third, COOL didn't consider the priority of core tasks when interrupting to do its own work (COOL's
document editing process and LibreOffice core shares the same main loop). Now we do this,
categorizing the core tasks into "high priority" and "low priority" buckets and we only interrupt
when core doesn't have high priority tasks any more (this is only in 25.04).
Fourth, there was no easy access to a large Writer document during development. Now make run
COOL_WRITER_LARGE=y allows opening a long document in your local browser for development / testing
purposes.
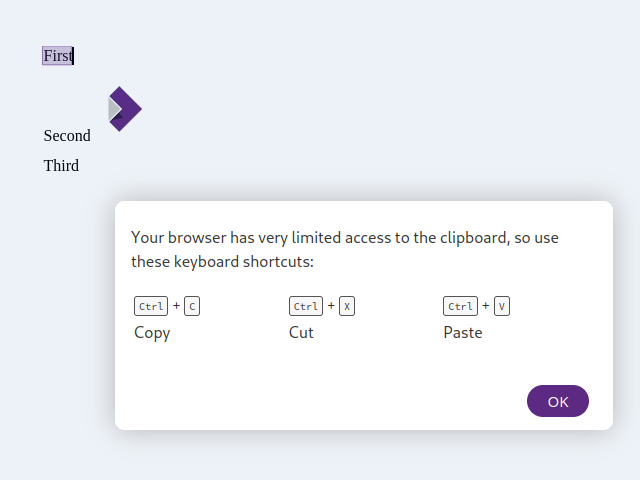
The primary reason why we needed similar, annoying dialogs for copy in the past is that the
clipboard API was synchronous but the network API is async. This means that writing to the clipboard
("copy") is only possible with data that we have in the browser when the copy is executed. This is a
problem, since in general we don't have data for your selection in the browser.
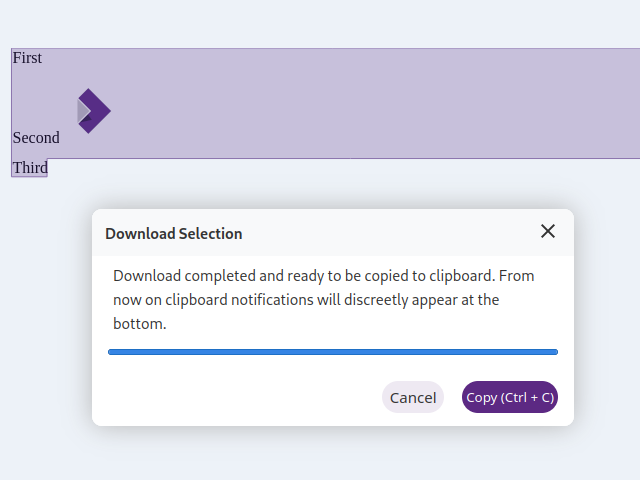
With the Clipboard API, the copy side can be improved as well. Instead of always fetching the HTML
for a simple selection (even if you don't copy) and having a three step copy for complex selections,
async clipboard write is now possible. This gets us rid of the "You need to download" dialog:
Instead, we still need to nominally write to the clipboard in the special keyboard or click context
initiating the copy (Chrome doesn't require this, Safari does), but the written object can be a
callback that will do the network operation for us.
Unfortunately it's hard to screenshot the new code, since part of the result is that all these
dialogs are now eliminated, copy & paste just works. :-)
Note that this can be used also in Firefox, but first you need to set
dom.events.asyncClipboard.clipboardItem to true in about:config.
The last part was to adapt tests to this new world, because previously it was handy to just create a
selection and assert what would be copied to the clipboard as HTML, but now we don't download the
HTML anymore every time you create a selection.
Collabora Online now has a ./gscript
that tries to bring some of the Gerrit-based review benefits to a workflow based on GitHub.
Motivation
Collabora Online is on GitHub, but core.git is still on Gerrit, so it made sense to spend some time on a small shell script that gives you review and backport experience that is closer to Gerrit than the stock GitHub workflow.
How we use GitHub
Most Online committers push their code for review directly to online.git, to private namespaced
branches, like private/kendy/master, then a pull request can be created to get commits from that
branch into master after CI, review, etc. This workflow has the benefit that you don’t have to deal
with the complexity of multiple repos.
Next to master, there are distro branches like distro/collabora/co-6-4, we may or may not want to
backport the contents of a PR to that stable branch.
It’s important that Gerrit used to have a git review command to just submit your changes for
review, without asking anything. That explains why the stock GitHub workflow where you need to name
the source branch of your PR feels unnecessary complexity. Creating the PR by visiting a webpage is
again something we want to avoid. Not to mention open questions like should you delete your source
branch after a PR is merged? Should you delete your source repo?
On the other hand, we’re interested in GitHub’s ability to have multiple commits in a PR: Gerrit
forces to have one commit per change. The GitHub way encourages developers to split changes into
more commits, now that the review and CI cost won’t increase just due to such splits.
Submit for review
The happy path is when you have one or more local commits and you want to submit it for review. In
this case now you can do:
./g review
And the script will figure out that you want to push your local branch to a remote branch like
private/kendy/master and also create a pull request for you, printing its URL.
In case that branch already exists then you need to specify a name:
./g review myhack
So parallel reviews are possible, but only the first gets an inferred name. Both cases need no
clicking in a browser, thanks to gh.
Submit a backport
The easiest case is when you can assume that the master branch and the distro branch is so close to
each other that there won’t be conflicts to be resolved. In that case, you can do:
./g backport distro/collabora/co-6-4 790
to pick all commits from PR 790 (which is already
merged to master) to a distro branch.
Again, you can have multiple backports in progress, e.g. you can do:
./g backport distro/collabora/co-6-4 790 myhack
If the default name is already used. The backport syntax is a bit longer, so you can always just
type ./g backport and you’ll get the usage.
This second command is a bit more complicated, as gh has no trivial way to expose what is the
commit range of a PR. But there is gh api graphql which can do arbitrary
GraphQL queries, which provide this
information. At this stage it may make sense to just rewrite the whole ./g script in e.g. Python,
but till that happens, we parse the output of the query using jq.
Finally, if you do have conflicts or you want a local build test / manual test before submitting,
you can always check out the distro branch manually, cherry-pick there and use plain ./g review to
submit your backport for review.
Want to start using this?
You can go to the Collabora Online community website and see how
to build the code. Then you may want to solve an
easy
hack, finally submit your commit for review either by using the above method or whichever way you
prefer contributing to GitHub projects.